Note: This guide will walk you through the process of setting up your ROLI Airwave and ROLI Piano in Bitwig
Setting up your ROLI Airwave and ROLI Piano in Bitwig is quick and straightforward, and since Bitwig is built for MPE (MIDI Polyphonic Expression), you can take full advantage of the expressive capabilities of this setup and software instruments like ROLI Airwave Player. Here's how to get started:
1. Connect your ROLI Airwave to your computer using the USB-C cable supplied.
2. Connect your ROLI Piano to your computer using a USB cable or Bluetooth (Mac only).
3. Open Bitwig Settings, go to Controllers and select ROLI Airwave Expression from the list. Click the Learn button, and you should see Airwave's MIDI CCs appear in the list.

4. Create a new track, selecting ROLI Airwave Player as the instrument.
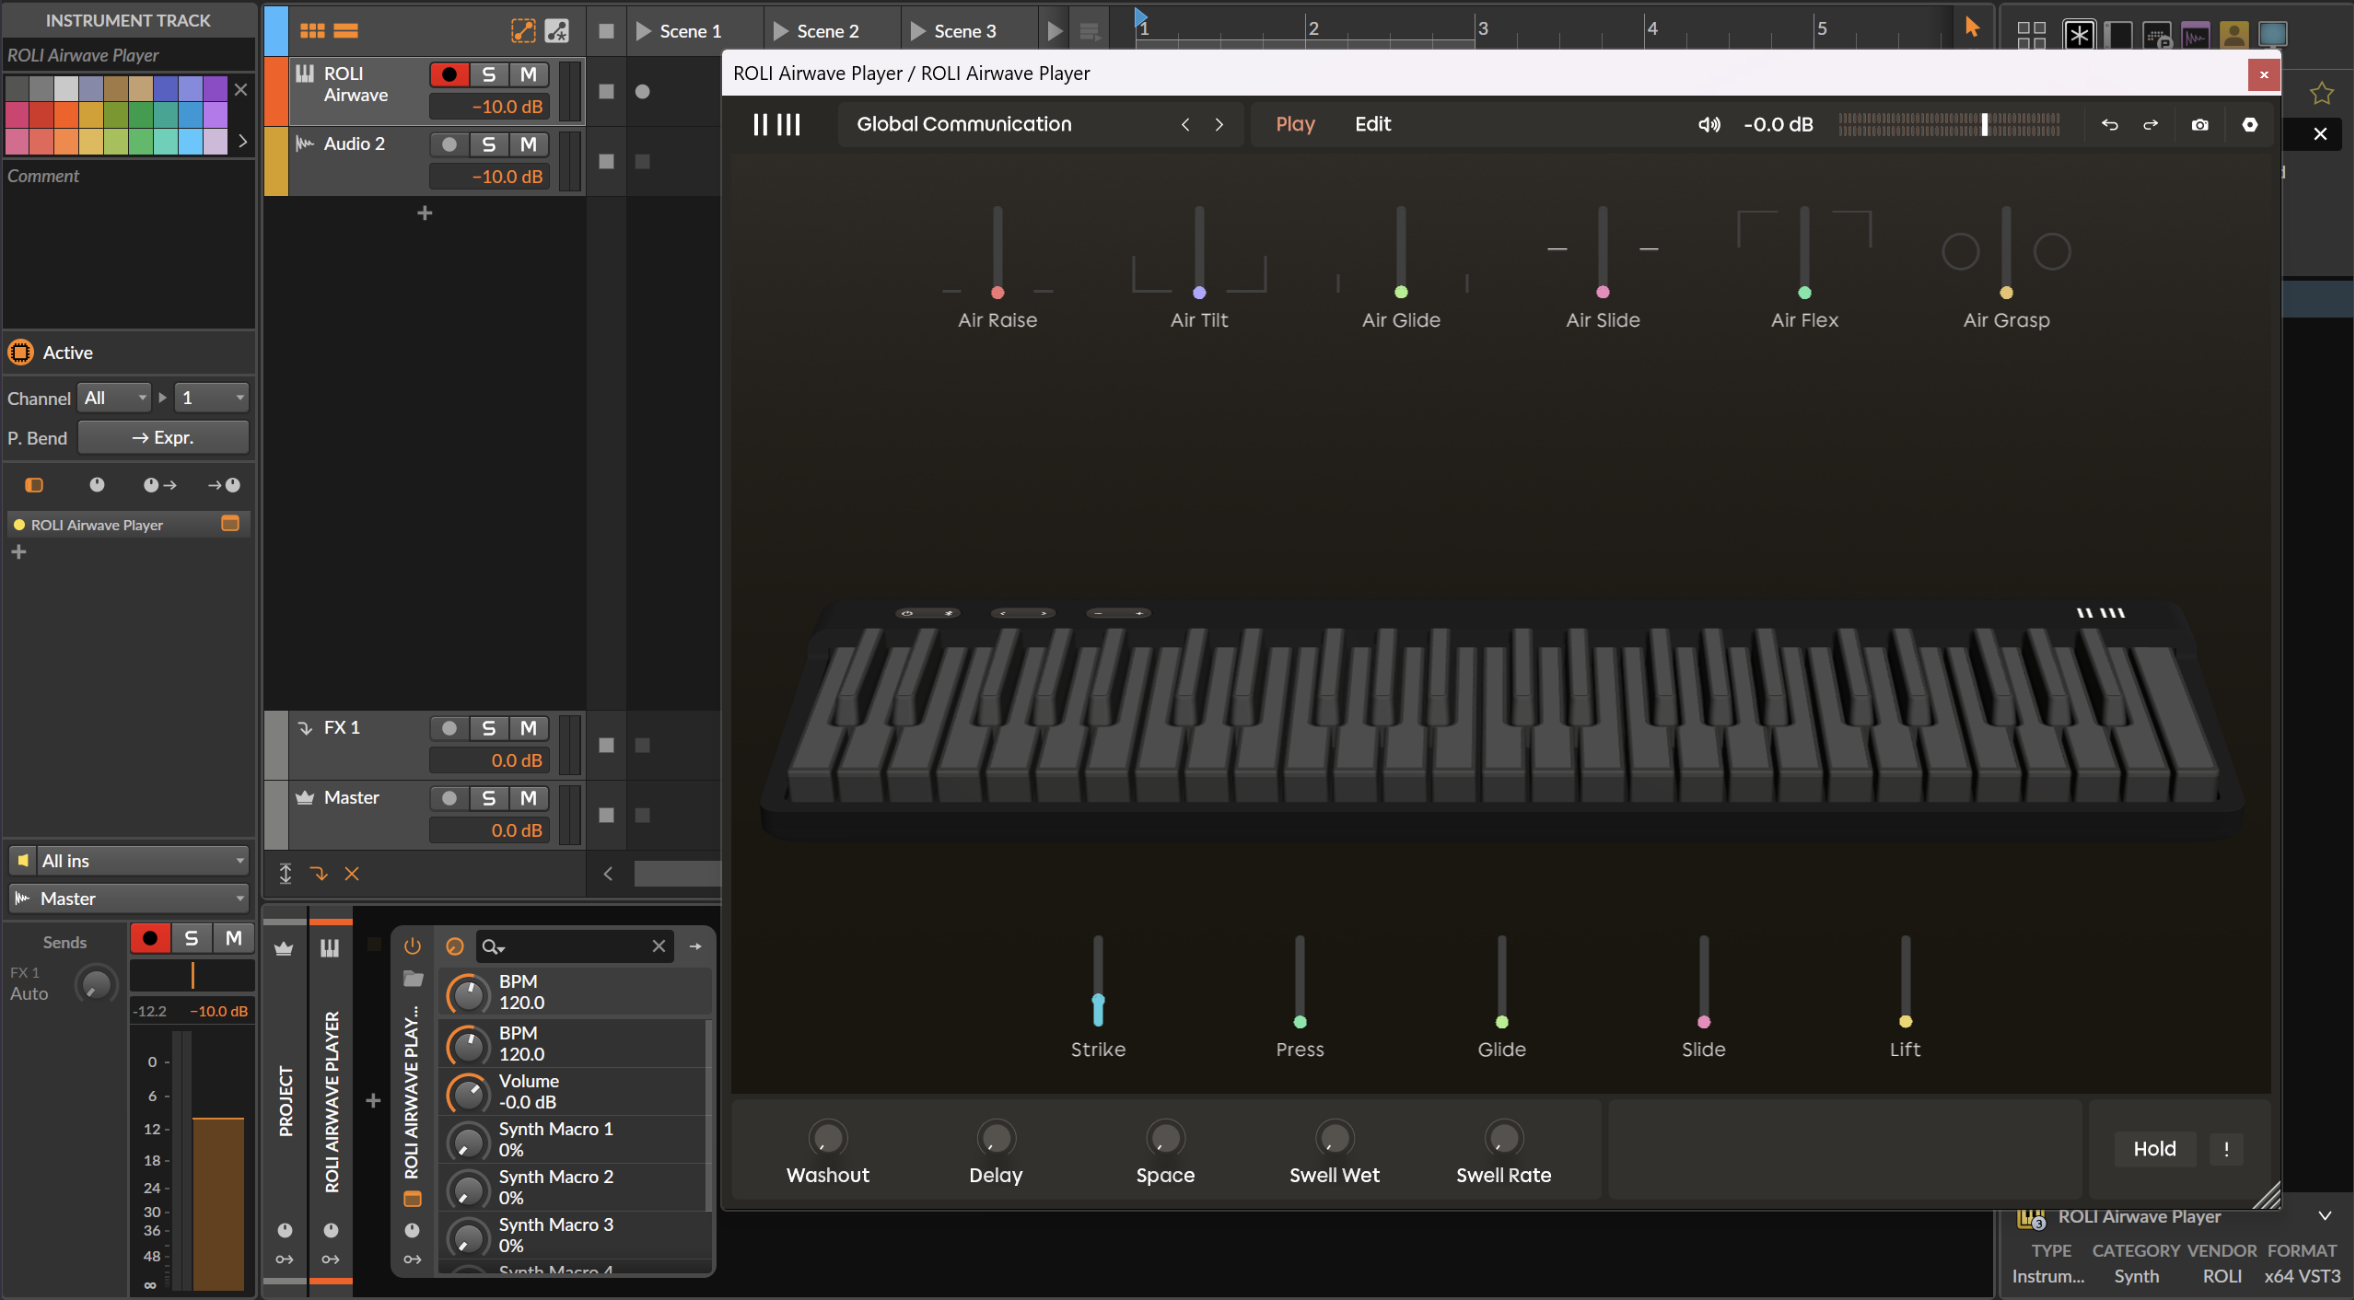
5. Inside the ROLI Airwave Player VST window, click the cogwheel icon in the top-right corner and select “Calibrate”.

6. ROLI Airwave Player will prompt you to select a device to calibrate. Since we’re using the ROLI Piano in this example, please select the ROLI Piano option.

7. Follow the on-screen instructions to complete the calibration process, then click Done to get started.

8. Arm the MIDI track for recording and start playing your ROLI Piano with ROLI Airwave. You should hear the sound of your selected instrument and have full expression.

Note: When playing back from the DAW, disable Air Dimensions to prevent the live data from overwriting the recorded performance data.How to map Airwave's Air Dimensions to Equator2 in Bitwig Studio
Here we will go through how to map ROLI Airwave dimensions to any assignable Equator2 parameter in Bitwig Studio.
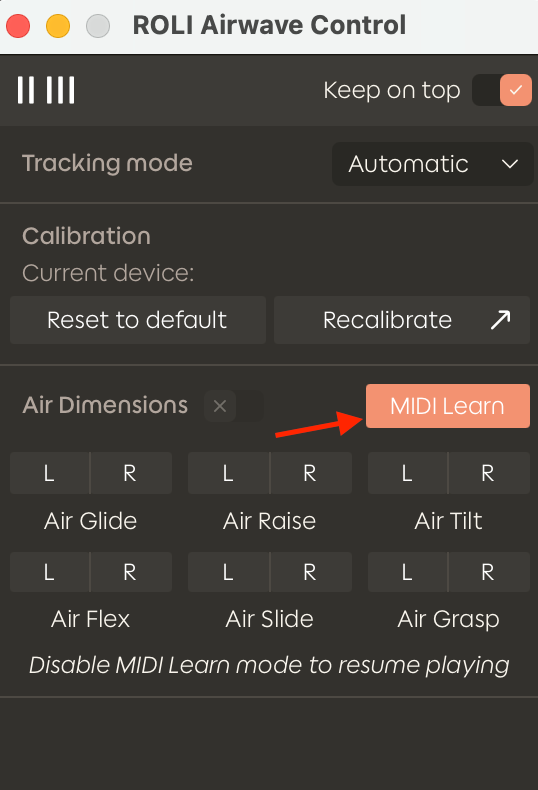
To MIDI map Airwave dimensions in a DAW, we must send Air Dimensions in isolation. In Airwave Control, you can do this by disabling Air Dimensions while in MIDI Learn mode.
Each hand is sent separately on the following CC numbers:
CC21 — Air Grasp
CC22 — Air Slide Left
CC23 — Air Slide Right
CC24 — Air Glide Left
CC25 — Air Glide Right
CC26 — Air Raise Left
CC27 — Air Raise Right
CC28 — Air Tilt Left
CC29 — Air Tilt Right
CC30 — Air Flex Left
CC31 — Air Flex Right
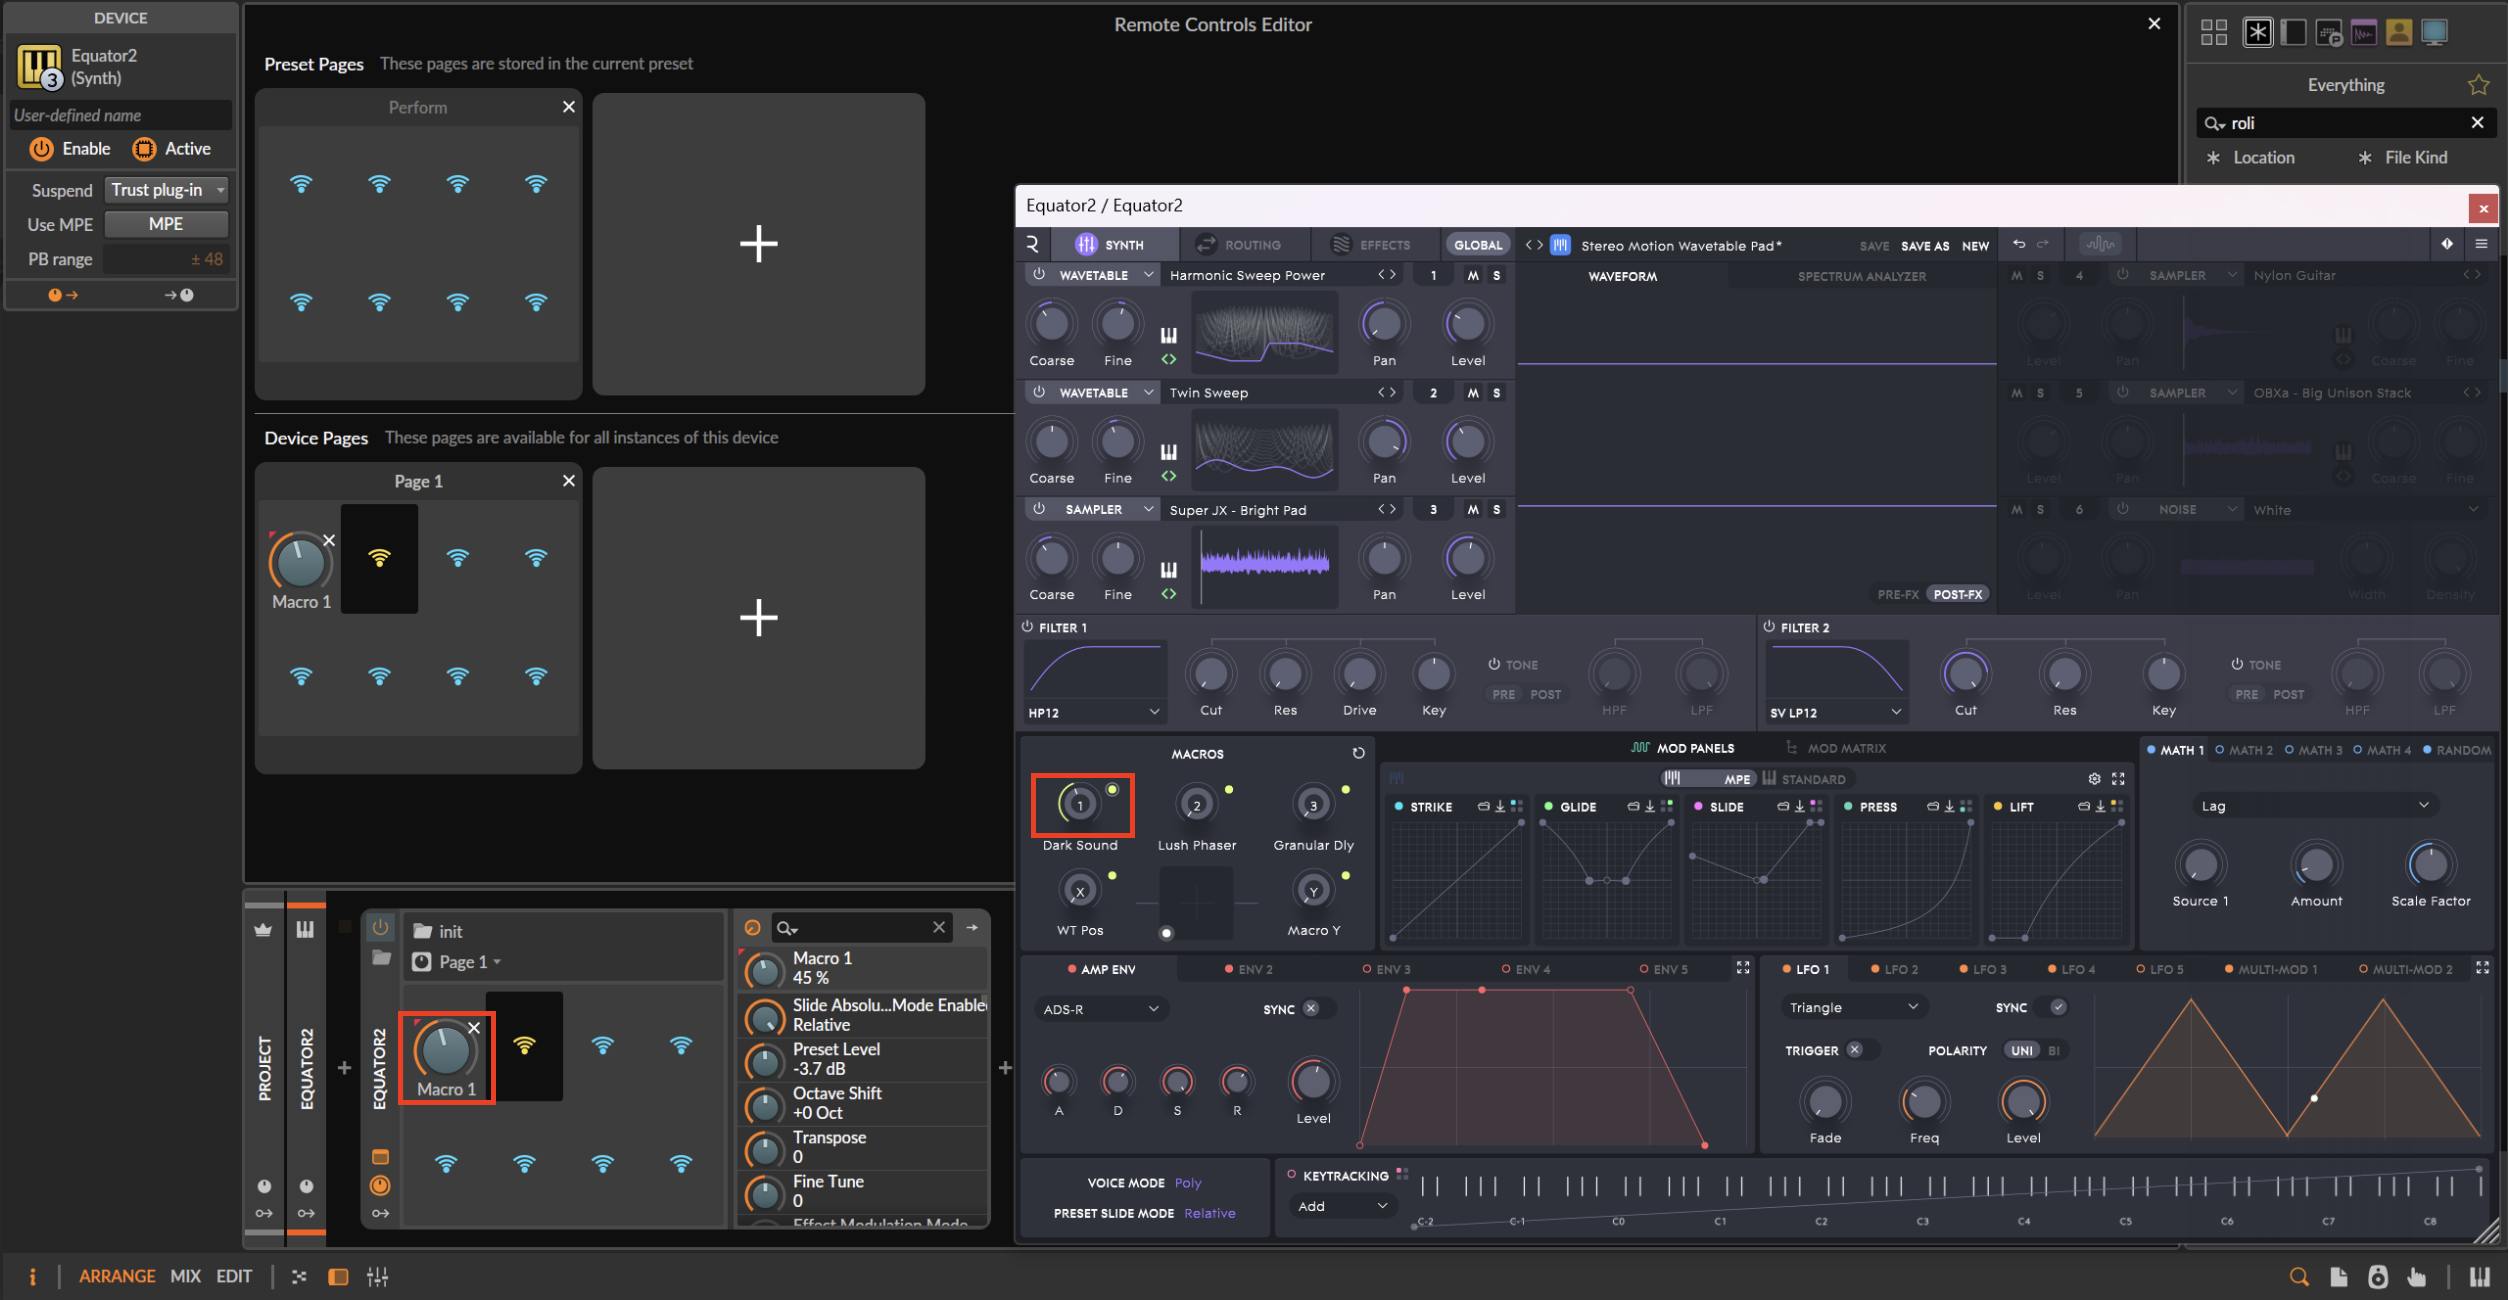
In the example below, we’ll manually map the Air Raise Right dimension to the Macro 1 knob in Equator2.
1. Insert an instance of Equator2 on a MIDI track, then click on the Macro icon, as shown in the screenshot below.

2. Open the Equator2 window, then click and move the Macro 1 knob, which will be assigned to the Airwave Air Raise Right dimension.
3. Then, right-click on the assigned Macro knob and select “Map to Controller or Key…”

4. Open ROLI Airwave Control, ensuring that MIDI Learn is enabled. Then briefly trigger the desired Air Dimension by clicking it once (in this example, Air Raise Right). Once assigned, the MIDI mapping for Air Raise Right (CC 27) will appear in the corner of the selected macro on your MIDI track.

5. Turn off MIDI Learn in ROLI Airwave Control, and you should now see the assigned knobs move as you raise your right hand to perform Air Raise.

With these simple steps, you can map your Airwave’s Air dimensions to any assignable parameter in Equator2, a third-party VST plugin, or any assignable control within Bitwig Studio.
If you need any additional help, please contact our Support Team for further assistance. Happy music-making!